How to develop an app, this is a question that millions of people ask daily but before tell you about How to make your own app; I want to tell you something about what is an app?
Today everyone, every brand, and every company have its own app like Uber Cab, Ola Cab, Hotstar, and so on. The app is just like a short form of application. You can use apps on your Android phones, iPhones, or tablets on the other hand application are used for laptops, PC, and computers.
The application is a software program that’s designed to perform a specific function directly for the user or, in some cases, for another application program. If you look at your smartphone or your phone, you will see App Icon that has squares in it.
If you are hungry just open the food-related app and order any dish.
Today I will explain how to build an app. Let’s get started:
How to Make Your Own App for Free?
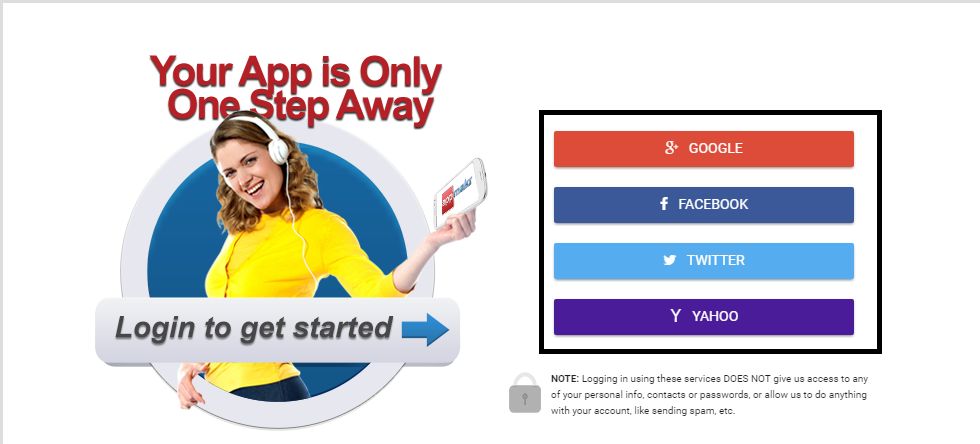
Step #1: To make your own app, first open Appmakr official website.
Step #2: Now click on the Login/Edit button as shown in the image below (located at the right corner).

Step #3: This will take you to the Login screen, now use any Google+, Facebook, Twitter or Yahoo account to log in.
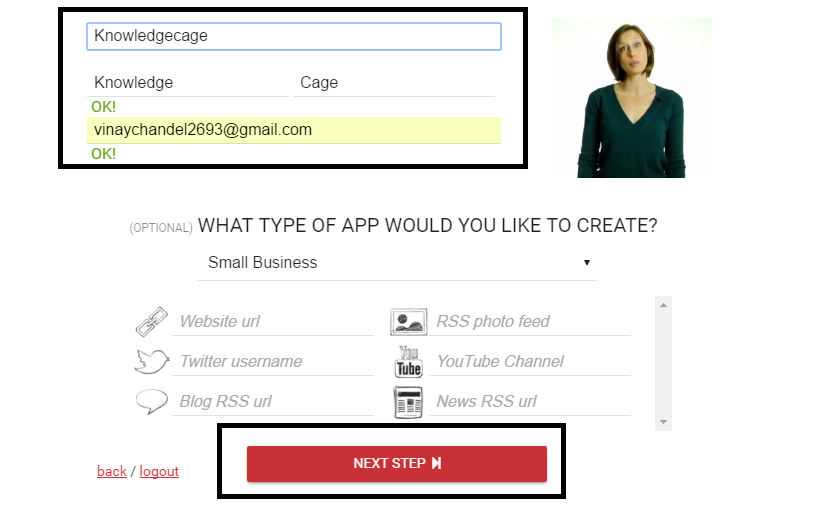
Step #4: Now you are in the Appmakr welcome screen, fill up your App name then App first and last name after that your email address and finally click on Next Step to continue the process.
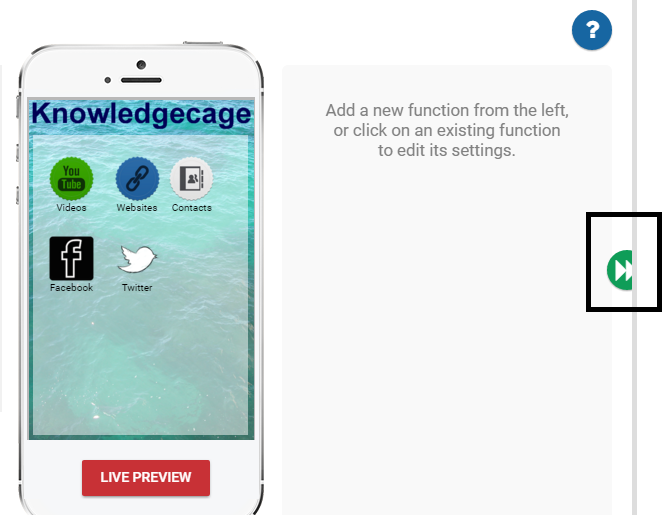
Step #5: This will take you to your App live preview screen as shown below.
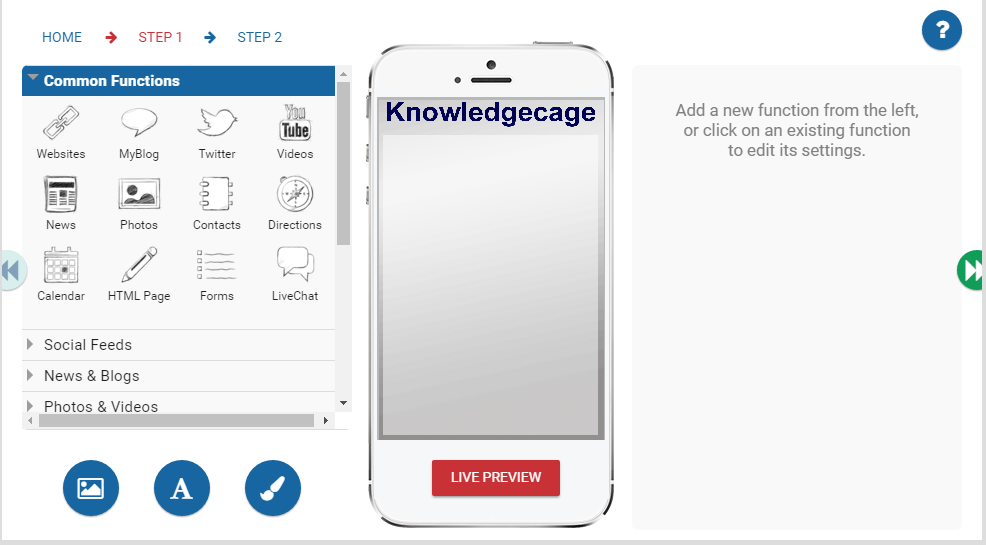
Step #6: Now you need to add a function to your app, you can see many icons on the left screen. Firstly drag the Youtube function from the left of the screen to your app.
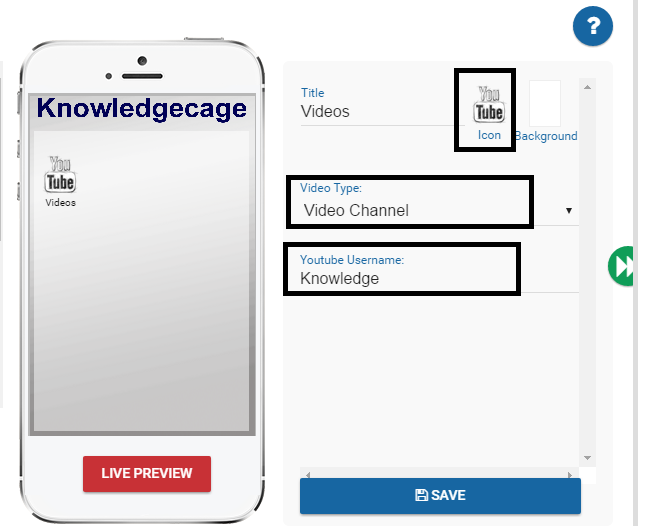
Step #7: On the right side screen you will see all the details about Youtube, now you can easily change the youtube icon, set the title for Youtube, and choose a background image.
Step #8: Click on the video type section and select the Video channel option from the drop-down list then type your youtube Username. If you want to change the icon of youtube, click on Icon and choose any Icon of your choice.
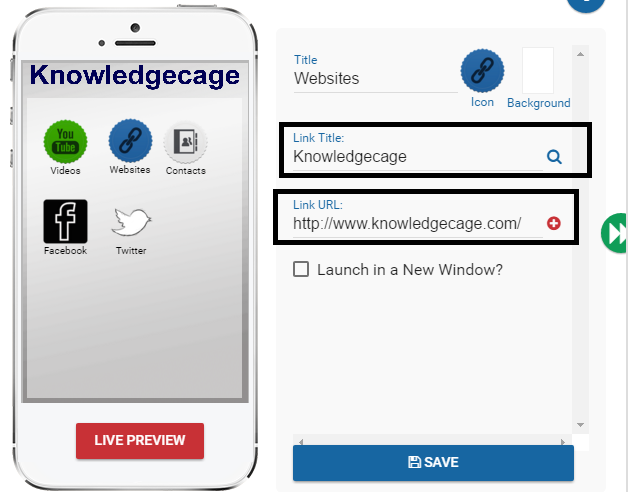
Step #9: Next drag the Website function from the right screen to your App preview. Again change the icon by clicking on the icon and choosing another icon. Then type your website Link title and put down your website link as shown in the image below.
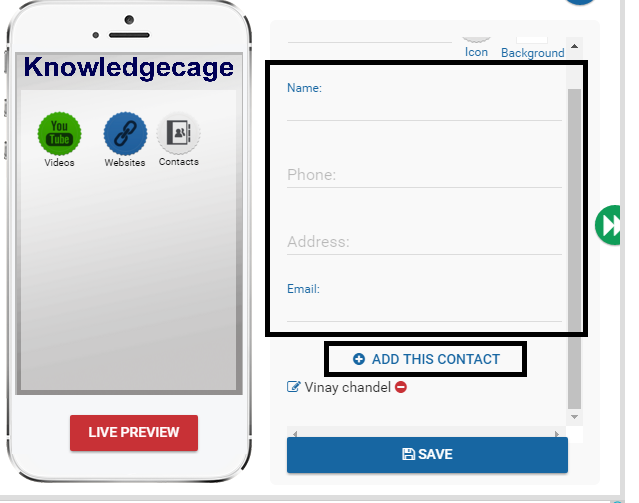
Step #10: Next, drag the Contacts function from the left screen to the app preview, change the icon if you want. Then type your name, phone number, address, and email. Finally, click on Add this Contacts.
Step #11: If you want any other function to your app, simply drag them from the right screen to your app.
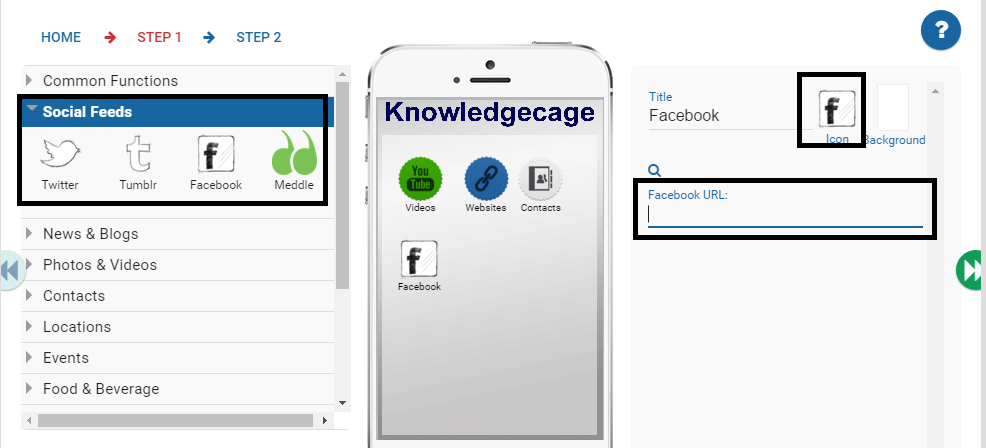
Step #12: After putting common functions in your app, next you should click on Social Feeds. Now drag the Facebook function to the app preview, then change the Facebook icon and put down your Facebook URL.
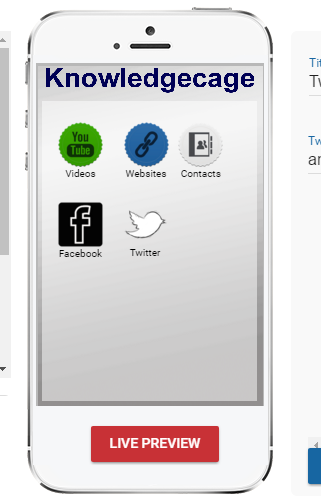
Step #13: Next, drag the Twitter function to the app preview and change the icon if you want to change after that put down Your Twitter URL.
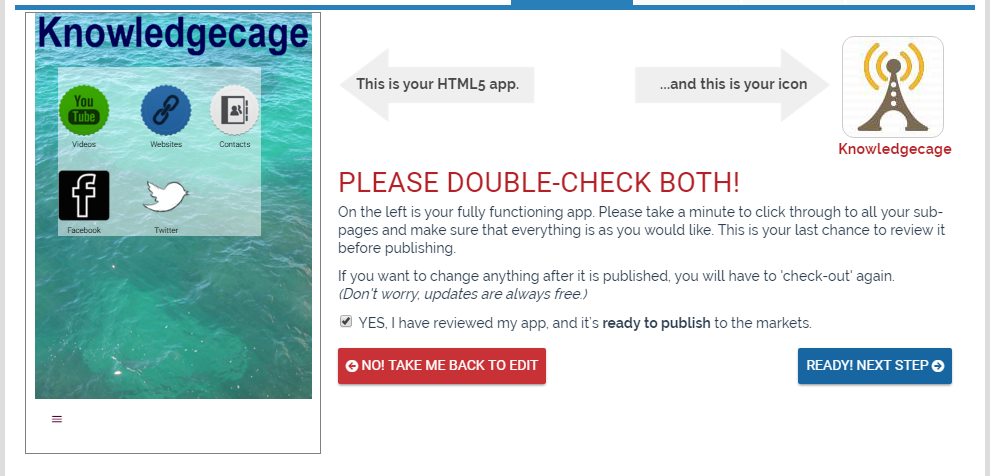
Step #14: When you added all the functions you want, simply click on the Live Preview button to test your app Look.
Step #15: Now you will able to see a live preview of your app, if you are happy with your changes, just go ahead and save all the functions.
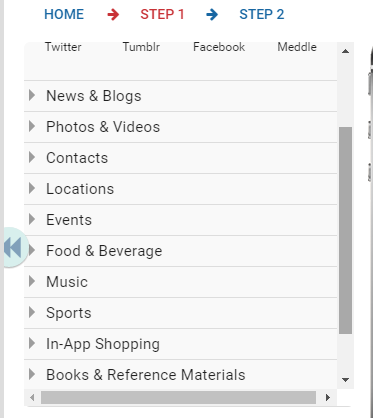
Step #16: There are many other functions like News & blogs, photos & Videos, Locations, Contacts, Music, and Sports. You can also add them to your app.
Step #17: If you want to make your app more attractive, simply click on the Background or Splash icon after that click on Image Library, now you can choose an image from the library, and you can also upload your own image.

Step #18: If you want to change the header of your app, simply click on Title or Header Image icon, and then you can choose app name colour and you can also upload an image for your app header.

Step #19: Now click on the Next icon to continue the process.
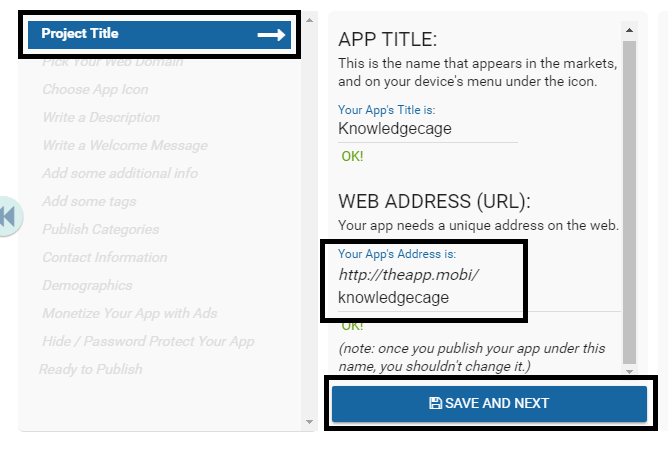
Step #20: Now add your app’s full information, starting from Project Title, you have already done this. Another thing you will get your web address here, simply click on the Save And Next Button.
Step #21: This will take you to the Pick your Domain name section, click on the drop-down button and choose the name related to your app then click on Save And Next. (Means if you are making your technology app then choose a domain name related to technology)
Step #21: Now in the Choose App icon section, simply click on free Library and select the icon for your app, finally click on Save And Next.
Step #22: Now click on Edit Description and describe your app then click on Save And Next.
Step #23: After that write a welcome message and add some Additional Info then click Save And Next.
Step #24: Now you are in Add some Tags, it is important to add some valuable tags because these tags will help anyone to search your app easily.
Step #25: Now choose a category related to your app.
Step #26: Then add your Contact information.
Step #27: In the Demographics section, choose your religion, country, and state.
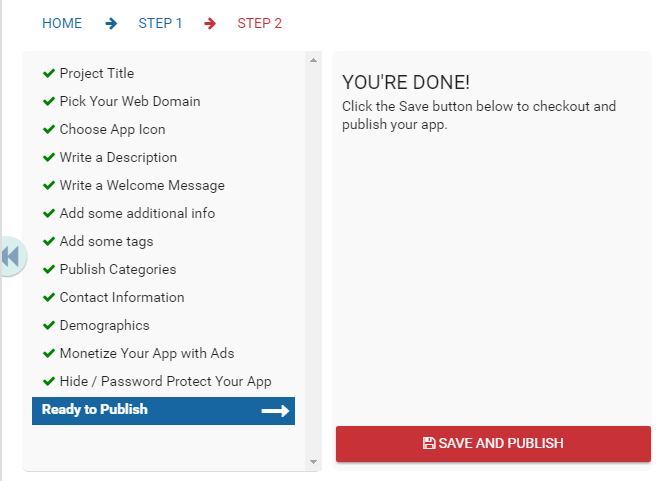
Step #28: After done that finally click on Save and Publish.
Step #29: Now you can see what your app will look like.
Step #30: After done every step click on PUBLISH MY APP NOW.
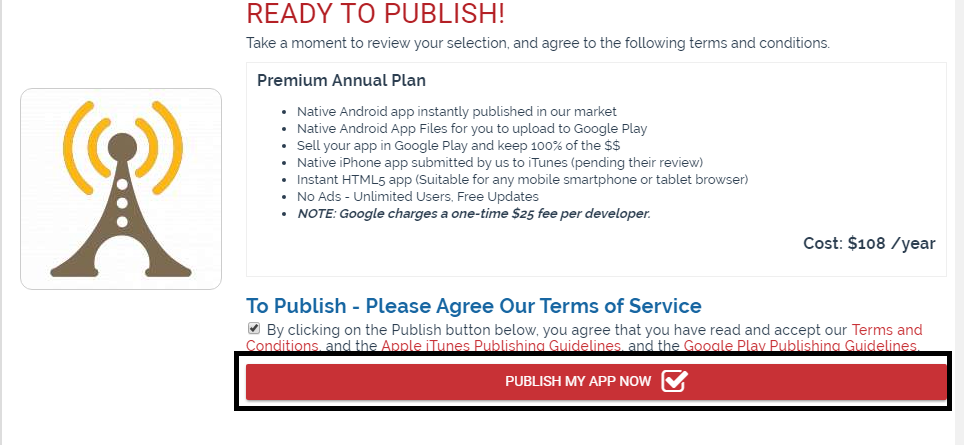
Step #31: That’s it, your app is created. Now you will get a message from the app maker that your app has been published live to the web in the mobile HTML5 Version, and your app has been submitted to the Appmakr market as a Native Android app.
Also read:
Final Words
I hope from this article you got the solution for how to make your own app. If you like the article where we describe how to code an app, then share it on social media.