Raspberry Pi might be a new term for many of our users. Thus, before we move further and learn how to control a Raspberry Pi using WhatsApp, I would like to illustrate some information on Raspberry Pi first, and then we will learn what’s the need of controlling Raspberry Pi using Whatsapp and how do we actually do that.
Without knowing the real definition of Raspberry Pi, it will be truly unfair to start the guide for those who are not aware of the term Raspberry Pi!
The Raspberry Pi is a very small credit card-sized computer that functions everything from learning to programming and listening to music.
Although it’s very small in size, it helps explore computing to people of every age group. You can learn languages like Scratch and Python on this little device.
If you have questions like how to work on a device that is that small in size, then let me clear your doubts. We plug in Raspberry Pi to the computer, Tv, and other supported device and it uses the standard keyboard and mouse for typing and pointing purpose.
This device, however, is very useful but due to its small size and the way it functions(plugin into TV, computer, and other devices), it’s very difficult to keep track of its temperature, disk space, and its overall condition in the real-time.
But we have a simple workaround for this problem. If we connect Raspberry Pi to Whatsapp, you won’t have to bother about anything.
The Raspberry Pi will itself tell you about its condition by messaging.
Sounds interesting, isn’t it? Let’s find out how do we do that.
How to Control a Raspberry Pi Using WhatsApp:
We control a Raspberry Pi by using a tool called Yowsup. Yowsup is basically a python library that offers all the features of Whatsapp on the Raspberry Pi. It functions exactly the same on a Raspberry Pi as a Whatsapp client works on a smartphone.
But one thing which you require before installing Yowsup on Raspberry Pi is Raspberry Pi B or B+ Installed that runs Raspbian on it. if you don’t have that installed on your computer, you better go off and stop reading further right here.
And if you have Raspberry Pi B or B+ Installed on your computer, continue reading the rest of the guide. Now let’s go through the steps for controlling Raspberry Pi via Whatsapp.
Step 1. The first step as said earlier is to install the Yowsup python library on Raspberry Pi. But before doing that, it is recommended to upgrade all the previous packages installed in Raspberry Pi.
To update the previously installed packages, you need to run the following command.
sudo apt-get update

Step 2. Once all the packages are updated, you need to update the firmware. A command for the same is given below.
Command:- sudo rpi-update
Step 3. After upgrading previously installed packages, it’s time to install all the necessary new packages on Raspberry Pi, which are required to install to Yowsup.
Commands to download those necessary packages are given below.
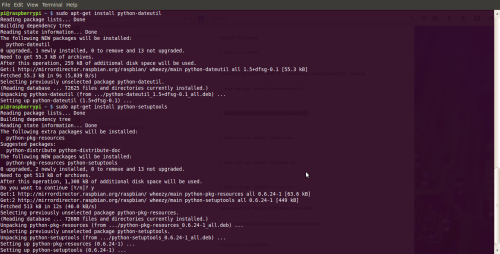
sudo apt-get install python-dateutil

sudo apt-get install python-setuptools

sudo apt-get install python-dev

sudo apt-get install libevent-dev
sudo apt-get install ncurses-dev
Step 4. Now its time to install the downloaded Yowsup library. For this, run the following command to download the library.
git clone git://github.com/tgalal/yowsup.git
Step 5. Once the Yowsup library downloaded, you need to install it. The following command will help you get into the Yowsup folder and install the library successfully.
cd yowsup

sudo python setup.py install
Step 6. Once the installation of the Yowsup library is done successfully, we need to register the WhatsApp. For this, you need to know your country code(cc), mobile country code(MCC) and mobile network code(mnc).
If you don’t know your cc, MCC and mnc, use the following command to know about it.
python yowsup-cli registration –requestcode sms –phone 91 xxxxxxxxxx –cc 91 –mcc 405 –mnc 035
Write the complete number replacing the xxx with the original digits. 91 is the country code that should be replaced with your country code. Similarly, other details can be different depending upon your details.
Step 7. As sooner you run that command, all the requested data will show up as the result and you will get the code on your mobile. Now you need to enter that code to register the Whatsapp using the following command.
python yowsup-cli registration --register xxx-xxx --phone 91xxxxxxxxxx --cc 91
Replace xxx-xxx with the code you received on your mobile. With that, registration would be completed. But remember, don’t use the same number you use for your daily Whatsapp messaging. One Whatsapp number can be used only in one device.
Step 8. Okay, it’s now time to use the Whatsapp. The process is simple. All you need to do is to enter your phone number and password. You need to save the config file inside the Yowsup folder using the following command.
sudo nano /home/pi/yowsup/config
Step 9. Once done, quickly copy the following command and paste it into the config file.
## Actual config starts below ##

  cc=39 #if not specified it will be autodetected

  phone=39xxxxxxxxxx

  password=xxxxxxxxxxxxxxx
Step 10. Now navigate to the Yowsup folder by the following command,
cd /home/pi/yowsup
And start yowsup-cli demos. Command for the same is given below.
yowsup-cli demos –yowsup –config config
As sooner you do this, you will be encountered with Yowsup prompt. Now first use ‘/L’ command for login. If you are confused about the commands, use the “/help” command to see all the available commands.
Okay, after using the /L command, enter the login credential which you saved in the config file.
If you want to send a message to the desired number, use the following command.
/message send 39xxxxxxxxxx "This is an exmaple message sent from Raspberry Pi"

The message sent will be displayed on the Raspberry Pi. So that’s how to control a Raspberry Pi using WhatsApp.
At a glance, this guide might seem confusing, but once you will go through all the steps carefully, things will appear really easy! If you encounter any problem while following the steps, feel free to contact us via the comment box below.