You are a human, you are living in the 21st century, so no doubt you are in need of an E-mail account. And well I can bet 9/10 of you own a Gmail account, of course, because of the trust and security that Google offers. Google is pretty serious about its products, and that’s why it owns at least one company, with each and every letter of the alphabet.
Now, following repeated attempts of hackers trying to get into Gmail accounts, Gmail launched the un-hackable two-step Verification system, so if you’ve ever wondered how to set up a Google two-step verification procedure on your account, this is the perfect place to be.
What is Google Two-Step Verification System?
Google Two-step verification procedure is one of the best security measures for your online stuff in the world, especially when it comes to your e-mail accounts.
What this Two-step verification system basically does is, add one extra layer of security to your Gmail account, apart from your password.
Because as it goes without saying, and even the founder of WordPress, Matt Mullenweg said it:- Passwords are the weakest part of your online security.
If you set up the Two-step verification procedure on your Gmail account, here’s what will happen to your Gmail account:-
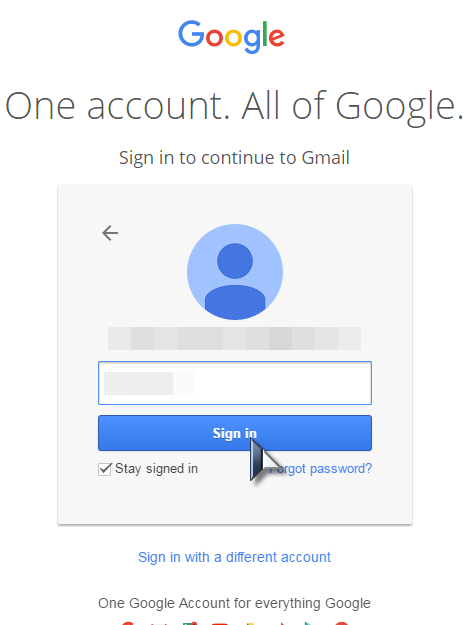
- You enter Gmail.com
- You enter your Email ID & Password.
- Then, Gmail will send you an OTP on your cell phone, which you have to enter on the next screen to log in.

- And only after the successful verification of both the Password and the OTP can you log in to your account.
You can also select the “don’t ask again on this computer” checkbox.
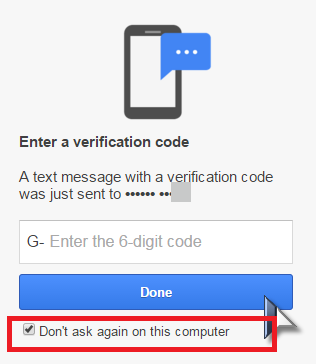
If you log in to your system frequently. You should check that box, then Gmail won’t ask you again for the OTP on that specific system, but except for that system on any other computer, the OTP will still be required every time they try to log in.
So that was about what the Google two-step verification system is, right? How about working on how to set it up?
How to set up Google Two-Step Verification System?
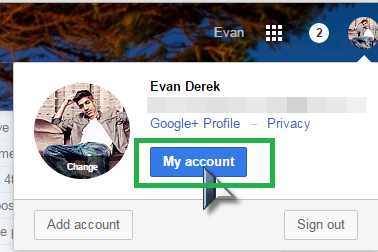
Log in to your Google Gmail account, and head over to my account section.
On the next screen, you need to check the Sign in and Security tab and click on the Get Started button over there.
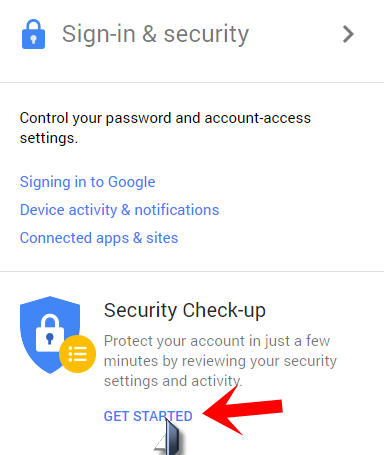
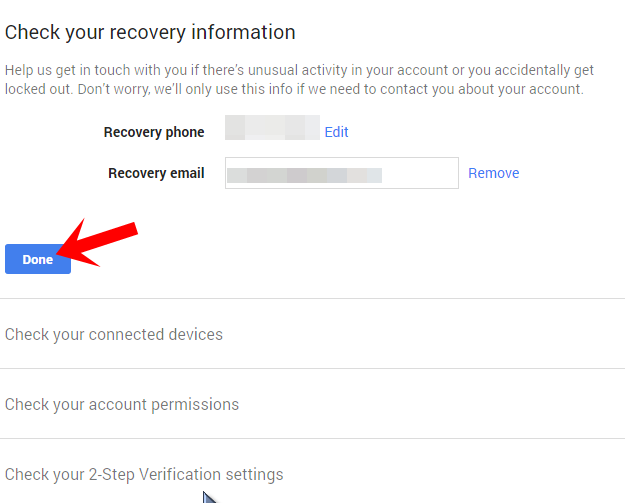
This screen will take you to your Google security center, this is where you can control almost every aspect related to your account’s security, be it your recovery Email, Cell phone number, or the two-step verification system.
Well, in order to set up the Google two-step verification system, you need to click on the done button, no matter where it appears.
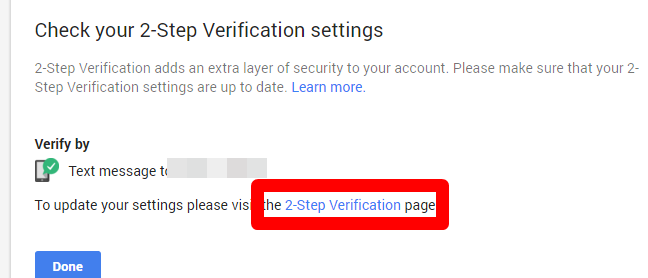
Keep clicking the done button until it gets you to the two-step verification tab. Once you reach the verification tab, it should look something like the below screenshot, and in that tab click on the “2-step verification page” link.
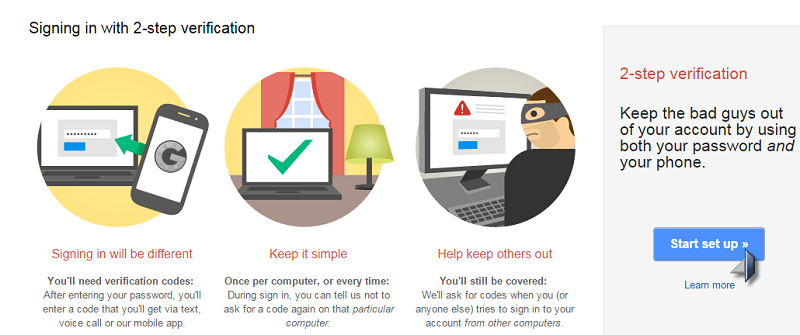
Which should take you to the final page where you set it all up. So just click on the “Start Setup” button.
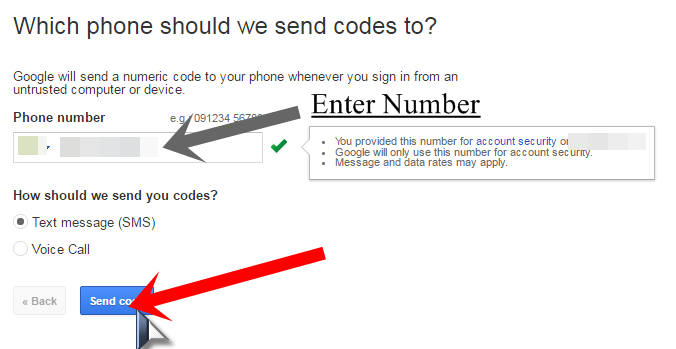
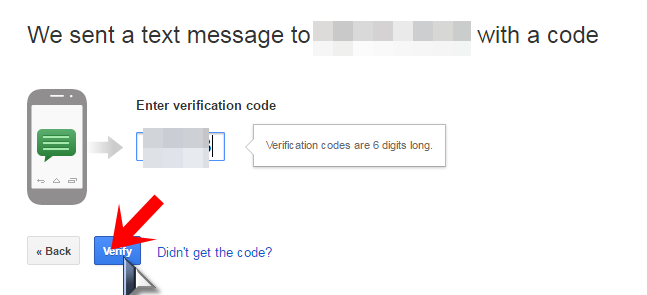
Now in the next screen, enter your Cell phone number which you want to use to receive the OTP’s while logging in. After done with the Cell number, enter the mode via which you want the OTP, you can set it to either Text Message or Voice Call depending upon your preference. And then click on the “send code” button.
Once you click that button, you will receive an OTP on your cell phone, almost immediately. Enter this OTP on the screen, and click on Verify.
Well, you are almost done!
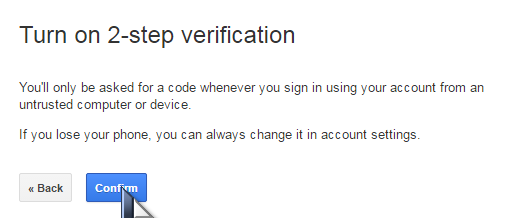
The next screen is just a “fail-safe” kind of thing, it’ll ask you if you want to make the current computer a trusted computer. Well, if you’re on your private computer, and you’re sure no one else except you will try to log in to your computer, then you should make it a trusted one.
It’s important because losing a cell phone isn’t a big deal, and well you don’t want to lose your account forever just because you lost your cell, right? So if you have a trusted computer, you can log in to your account without the need for the OTP and change the two-step verification number to a new one.
But keep in mind, do this only if you’re on a private computer that belongs to you. If you’re in an internet cafe or at your friends’ system, then “un-check” the button, or else you can just change the box that says: “Trust this computer”.

Well, you’re done, now just click on “confirm” and you’re all set!
Now, you’ll be redirected back to paradise, I’m just kidding, you’ll be redirected to that 2-step verification startup screen, and now you should see something like the below screenshot on the right-hand side of your account.
Conclusion
If you’re seeing that, then chill out, grab a cold coffee, and relax. But if you aren’t getting that little notification, you probably did something wrong and might have to start over again, in either case, I think I made my point clear, right?
See? Told ya, it takes less than 5 minutes to set up a Google two-step verification system, huh? Now that you’re “smarter” compared to your friends who don’t know how to set up a Google two-step verification system, go out and teach them too, after all, sharing is caring!
Also Read: